Sunday, 29 May 2016
The Most amazing Card Kit EVER. Medium Collage Cards. Stampin' Up! Aust...
Watch as I put together the medium Cards in the "Oh Happy Day" all-inclusive card kit, available from my store from June 1st.
www.AussieStampers.stampinup.net
Friday, 27 May 2016
Bakers Box Artfully Adorned. Stampin' Up!
This sweet little box was made using the Bakers Box Die #138279 and some extra embellishments I had in my stash, along with a retiring punch.
I enjoy having a day using up "leftovers" for my own personal projects when I need a gift for that special someone. It's fun re-visiting old stamps and punches, ribbons and trim and seeing what I can come up with.
I enjoy having a day using up "leftovers" for my own personal projects when I need a gift for that special someone. It's fun re-visiting old stamps and punches, ribbons and trim and seeing what I can come up with.
Free Gift for June. Stampin' Up! Australia
I am giving away a notecard wallet for all my June customers!
To receive your wallet from me, please remember not to check the "no contact" option when you place your order, so I can contact you to post out your gift.
This wallet fits the notecards and envelopes perfectly, and will hold 6 single layer cards and 6 envelopes!
Once you have received your wallet, you can use it as a template to make more of these.
The score lines for the wallet are :
2", turn 90 degrees
2 1/2", turn
2", turn
3 3/4 "
Now turn back 90 degrees in the opposite direction and score at 5 3/4" and 6 1/4" to make the spine.
Thursday, 26 May 2016
Balloon Celebration and Matching Punch.
The Balloon Celebration Stamp Set lends itself to lovely soft images: here I have simply pierced the edges of the card with a paper piercer to add to the ethereal feel .
Balloon Celebration #140675
Balloon Bouquet Punch # 140609
Wednesday, 25 May 2016
Using masks and embossing for backgrounds.
The background piece on top was made by watercoloring a mix of colours then running the page through an embossing folder and spritzing well with water. this flattened out the embossing, but left a pretty design on the surface. The other 2 pieces were made by sponging over decorative masks. I spritzed the pink and blue piece on the left with water, and left the blue piece on the right untouched as I wanted to accent the ombre effect of different hues of sponged link.
Sneak Peek Thoughtful Banners Bundle. Stampin' Up! Australia
Sunday, 22 May 2016
Case-ing the Catty... "Gift From the Garden".
Desk Top Card Organiser using the Gift Box Punch Board. Stampin' Up! Aus...
Here is a nifty card organiser made with the gift box punch board. I have changed the design to incorporate a taller, more sturdy box to hold items on your desk.
Saturday, 21 May 2016
Retiring Favourites: Day 6 with Techniques. Stampin' Up! Australia
How's this for a cute baby combo? I was so thrilled to "accidentally" discover this new technique while I was making the first card...I was able to re-use the framelit mask to make a second card. I am christening it "the layered Die cut Technique!" Scroll down to the video below for the tutorial.
Thursday, 19 May 2016
Retiring Favourites & Techniques: Day 5. Stampin' Up! Australia
Swallowtail is retiring! This is such a beautiful stamp. Watch the video to see some suggestions on how to use it.
Wednesday, 18 May 2016
More Sneak Peeks from the new Catalogue!
I am just loving these new stamp sets, particularly the mason jars with matching framelits!
Check back on June first to see the new catalogue live on my blog. I will also be doing a catalogue walkthrough for you on Youtube on the Aussie Stampers Channel.
Check back on June first to see the new catalogue live on my blog. I will also be doing a catalogue walkthrough for you on Youtube on the Aussie Stampers Channel.
Colourful Thanks Card. Stampin' Up!
Colourful Thanks Card

Here are the supplies you will need:
Stamps
• Work of Art Stamp Set
Paper
• Bermuda Bay, Calypso Coral, and Whisper White Cardstock
Ink
• Basic Black Archival Stampin’ Pad®
• Bermuda Bay, Blushing Bride, Calypso Coral, and Daffodil Delight Classic Stampin’ Pads®
• VersaMark® Ink Pad
Stampin’ Up! Accessories
• White Stampin’ Emboss® Powder
• Everyday Chic Designer Washi Tape
• Fast Fuse Adhesive
• Mini Glue Dots®
• Sweetheart Punch
• Heat Tool
• Embossing Buddy®
Retiring Favourites & Techniques: Day 4. Stampin' Up! Australia
Try these new inking techniques : the results are always surprising, and you get a slightly different result every time.
This technique uses rock salt, water, and Shimmery White Cardstock.
Here is a different technique using painters tape and going direct to stamp pad.
Monday, 16 May 2016
Retiring Favourites & Techniques: Day 3. Copic Colouring. Stampin' Up! Australia
Copic colouring! Sweetbriar Rose is another retiring stamp set. Note the shading using both warm greys and cool greys in copic colours.
I have chosen to frame the mauve version and mounted it on Old Olive and Wisteria Wonder Card stock.
Shadow: W00 W1 W3.
Stamen : Y18 Y19.
Flowers BV0000 BV 11 BV13 BV17.
Leaves: Stampin'Up! Blendabilities (now retired) Old olive, light medium and dark, plus copic G20.
The pink version has been mounted onto Melon Mambo and Old Olive Cardstock.
Shadow: C1 C3 C5 R0000.
Stamen: Y00 Y21 Y23 Y26.
Flowers R0000 RV 02 RV13 RV21 RV06.
Leaves: G20 YG03 YG23.
Sunday, 15 May 2016
Oh Happy Day Card Kit Assembled. Stampin' Up! Australia.
I have been filming and assembling the "Oh Happy Day" card kit today. It is an all-inclusive Kit and I have nick-named it the "most amazing card kit ever" as I had so much fun putting it together, and the designs are gorgeous! There are 4 different sizes of cards and envelopes, and there are 2 styles of fun-fold: A heart-shaped tri-fold card, and a matchbook card, as well as a medium and large sized regular card design. There are a total of 20 cards in the kit!
It will be available on June 1st in the new catalogue.
Retiring Favourites & Techniques: Day 2. Stampin' Up! Australia
Here is a technique you may not have seen before: Embossed envelopes and how to make a seal for the back of the envelope. The Retiring stamp set is the Hostess Set "A Whole Lot Of Lovely."
Saturday, 14 May 2016
Last of the Sale-A-Bration Card Projects.
Sale-A-Bration Cards in a box! These little 3" x 3" cards were just calling out to be made. I stamped the envelopes to match and tucked them into a criss-cross box. Quick and Easy! We made these in class some time ago and I thought I would share them with you today.
Sneak Peek: New Designer Series Paper and Embossing Folder!
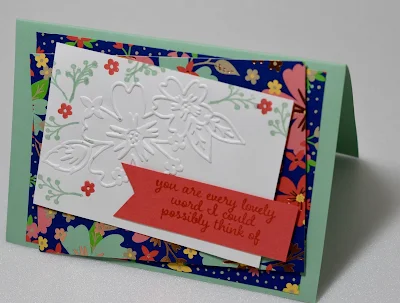
This card was made at the Onstage Event at the Hilton Hotel in the company of 9 lovely new stamping friends, who happened to be sitting at my table. It features a new paper suite called "Affectionately Yours", which is a specialty paper with copper highlights embossed into the design. It works beautifully with mint macaron and watermelon wonder cardstock. The card also features a new embossing folder: "Floral Affection," which has lots of possibilities for sponging, watercoloring and similar techniques. Another couple of products that will be available to co-ordinate with this suite are copper embossing powder, and fine copper thread.
Retiring Favourites & Techniques Series Day 1. Stampin' Up! Australia
In this video I show you some of my favourite retiring stamp sets and how to make pretty cards with them. I used Crystal effects to make the glossy hearts in this one.
The Stamp set is "Hot Diggity Dog."
Day 2: Most Amazing Card Kit EVER. Stampin' Up! Australia
In this video I show you how to put together the heart fold cards in the "Oh Happy Day" Card kit which will be available on June 1st in my store. The kit is all-inclusive , so the only extras I needed were some mini glue dots.
Monday, 2 May 2016
More from the Regional Art Gallery Exhibition.
Here are 4 of the 5 boxes / bags that I exhibited in the Gallery.
The 5th box was too large to get a photo of with the limited space I had to photograph it, but you can see it in the final shot with the entire suite.
I named my exhibit "Autumn Gifts," as the boxes are intended be used as gift boxes (the belly bands slip off so you can pop a gift inside).
I couldn't finish without showing you the yummy food that was catered for the event. (We were served delicious wines as well.)
Subscribe to:
Comments (Atom)


