Showing posts with label twitterpated. Show all posts

Friday, 5 October 2012

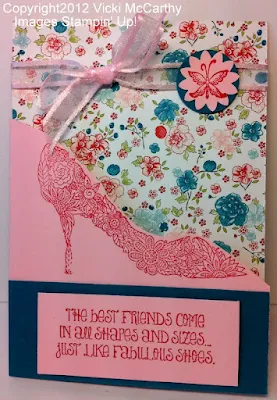
Fabulous You Youtube - Stampin' Up! tutorial- Stampin' Up! Australia

Here are the measurements and supplies needed for the "Fabulous You" YouTube tutorial:
  
Card Stock: - Stampin' Up! Pink Pirouette, an  A4 piece cut in half and folded down the middle, then
cut from the scrap piece a rectangle 3.3cm x 8cm and a small piece for the butterfly.
Island Indigo rectangle 4cm x 10.5cm plus a small piece for the circle.
Punches: Boho Blossoms and 1" Circle
Designer Series Paper: Twitterpated 10.5cm x 15cm
Adhesive: Snail and Dimensionals
Ribbon: Any soft pink organza ribbon or 3/8" Taffeta Ribbon in Pink Pirouette 122981  
Stampset: Fabulous You- wood mount 126520, clear mount 126522
Classic Ink: Primrose Petals 
 
Hope you enjoy this card!


Wednesday, 1 August 2012

Birthday Cards - Stampin' Up! Australia

                                            I needed to make 2 birthday cards this week.
  • This card is for a teenager's 18th birthday. I wanted a nice masculine card, so I used the - Stampin' Up! pennant punch to make a banner. 
  • I cut the scallop edge using the scallop framelit.
  • Next I scored the front of the card every 1/2 inch using the Simply Scored Tool to give an embossed effect. This is a really versatile way to jazz up any card front and you can score on the diagonal as well if you have the diagonal plate.
  •  Each flag has a circle cut from the owl builder punch ( middle sized circle) 
and then I layered a 1 inch circle onto the smallest apothecary framelit die, which I cut out using the Big Shot.
  • The stamp is from the the Pennant Parade stamp set, and I finished the card off with some linen thread, and glued on some separate tiny bows.
 The card stock used was Whisper White, Certainly Celery, Night of Navy, and Daffodil Delight.


This next card was for a teenage girl who loves the clean and simple look. I kept the card fresh by using only two colours, Whisper White and Pear Pizzaz.
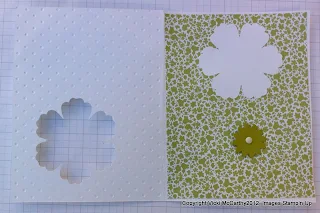
  • I started by punching out the flower with the blossom punch near the bottom right hand corner of the card. 
  • Next I ran the card front through the Big Shot using the polka dot embossing folder.
  • I layered a piece of Twitterpated Designer Paper inside the card and attached the punched out blossom in the top right hand corner making sure it didn't show through onto the front when the card was closed. This allows a space for journalling.
  • Next I cut a strip of pear pizzaz card stock for the front and punched out the flower centre using the boho blossoms punch.
  • I stamped the greeting from the Apothecary Art Stamp Set
  • I pierced holes using the paper piercing tool and inserted white brads into both these pieces of card stock then affixed the greeting to the front and the centre to the flower (which I lined up with the card closed) using Dimensionals.
The card stock used was Whisper White, Pear Pizzaz, and paper from the Twitterpated Designer Series.
I hope you like the cards!
 If you would like to come to a class in St Peters, Sydney just email me, or I can come to your home (minimum of 4 guests) and give a private class.

 Thanks for visiting, and have a great day.