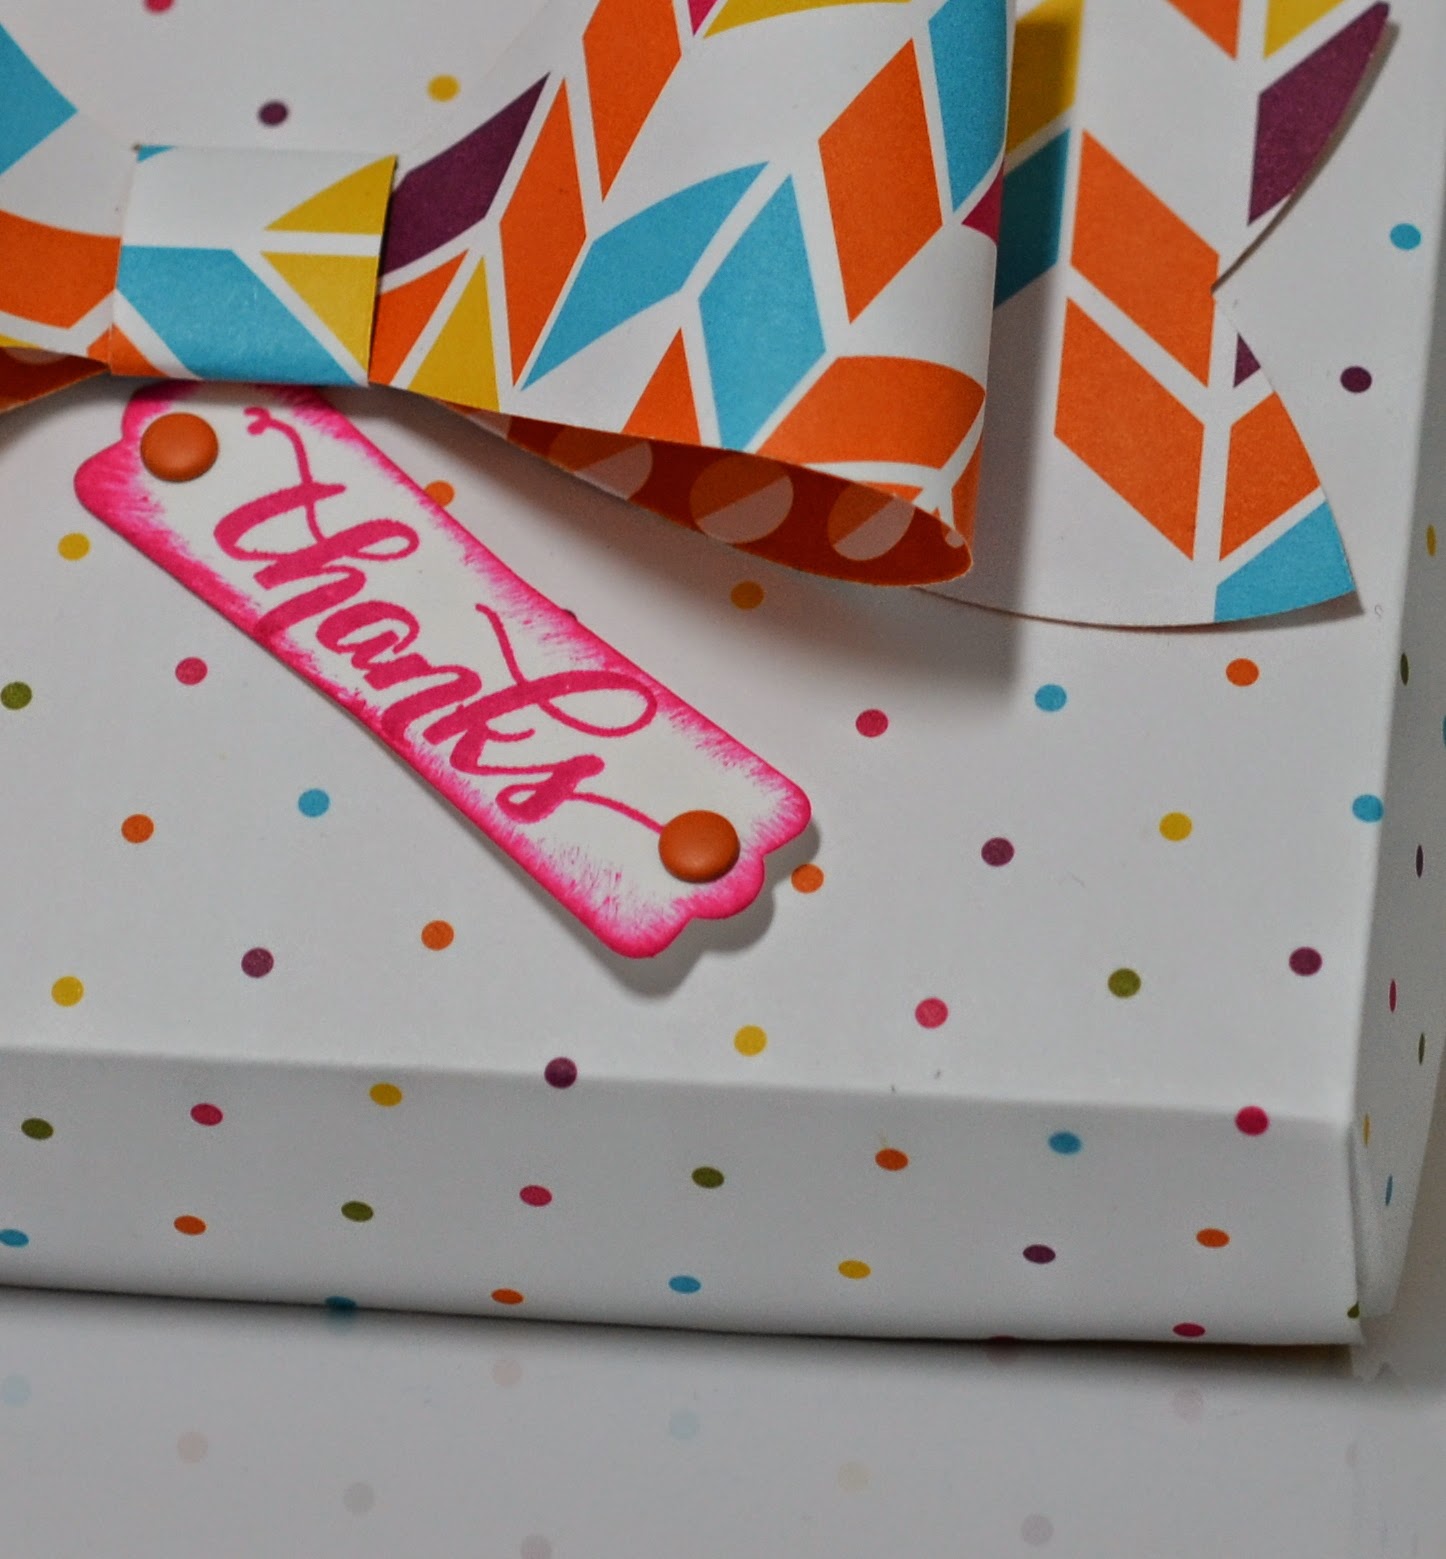
Watch the YouTube tutorial on How To Make the KRAFT NOTE CARD BOX from Stampin Up.
This box pairs perfectly with the Foil Frenzy Designer Paper. I had some left in my stash and realised the Kraft paper is a perfect match! Enjoy the video. Vicki x
Hello, and thanks for visiting my blog today.
Here is a technique you may not have tried before: no line watercoloring using markers.
I started by using watercolour paper. I coloured up my stamp using direct marker to stamp technique, which allowed me to stamp the image with pink blossoms (Melon Mambo) and green foliage (Old Olive).
I coaxed the colours out towards the middle of each section using my aqua brush, treating one section
at a time. I coloured the very centre of the bloom with yellow marker (Daffodil Delight).
I added a loose pale blue (Tempting Turquoise) watercolour wash all around the bloom as a background.
Finally I mounted the art piece onto Basic Black card stock and added a white heat embossed sentiment which I attached to the bottom left hand edge. The black rhinestones were coloured using a sharpie.
I love how it turned out, and it even looks though it could have been hand drawn.
Thanks so much to my lovely online customers for shopping with me! Vicki x💝
Hello and welcome to today's blog post and papercraft project. I wanted to try some simple colouring using Prismacolor Pencils. These pencils have a gorgeous silky feel and are my pencils of choice for really smooth blending.
I kept it simple, and made sure to ground the image with some sketchy green so it doesn't appear to be floating on the page.
I used tuxedo memento black ink for all the stamping, and made sure to include a greeting inside the card as well as the sweet butterfly image.
I love doing a single layer card once in a while, and keeping it simple.
Thanks for stopping by, and I hope you enjoyed today's project. Vicki x
There is a video tutorial for this set of cards at the end of this post.
I have three special cards for you today, and I know you're going to love this technique.
I have used the stamp set "A Little Wild " to create a set of Tulle Window Cards that are as cute on the inside as they are on the outside!
I have floated the images on a sparkly tulle window that is sandwiched between the layers.
This technique is also suitable for acetate sheets if you don't have any tulle handy, although tulle is readily available in any fabric store and is inexpensive too. I found this soft white tulle with silver sparkly glittery pieces embedded in the fabric, at Spotlight.
I cased this idea from the very talented Jennifer McGuire, and have put a link to her post in the video.
The stamp set I have used really suits this technique, since it not only has matching framelits, but also has an image of the back of each of the cute little animals that match perfectly.
See how cute the inside of each of the cards looks! Aren't they just darling? I REALLY love this technique.
I hope you give these a try. You can purchase the stamp set and framelit bundle, as well as the Stitched Framelits that were used to cut out the windows, from my online Stampin' Up! Store
A Little Wild Bundle
145327 Wood Mount $85.50
145328 Clear Mount $73.75
Stitched Shapes Framelits 145372 $50.00
Other supplies Used:
Thick Whisper white Card Stock
Soft Suede Card Stock
Smokey Slate Card Stock
Sahara Sand Card Stock
Stampin' Write Markers
Aqua Brush
Wink of Stella Pen
Tear and Tape adhesive
Tombow Multi Adhesive
Stampin' Dimensionals
Mettallic Enamel Shapes
Balloon Celebrations Stamp Set
Balloon Punch
White Embossing Powder
Versamark Ink
Fine Tip Glue
Here is the Video Tutorial.
Have a good weekend, thanks for visiting, and happy crafting!
Make this Shadow Box for your Christmas Home Decor using an Ikea Shadow Box Frame.
This project is made using the Hello December 2015 Project Life Accessory Pack # 139654.
The only additional supplies you will need are some adhesives and whichever papers you choose for the backing sheets.
I have used a sheet of 12" x 12" DSP from the Home For Christmas paper (reverse of the Christmas Tree pattern) and a sheet of Lost Lagoon 12" x 12".
The Shadow box Frame is Ribba, size 50 x 50 cm (19 3/4" x 19 3/4"), available from Ikea.
The circles for the fluttering banner are punched out using the 3/4", 1", and 1 1/4" circle punches, then attached to the fine gold thread included in the kit.
The patterned circles in the kit are popped up on double dimensionals after winding the fine gold gold thread directly onto the sticky reverse side of the stickers....easy!
The vellum circle stickers are adhered straight to the page so they will give a translucent effect.
The circle banner was attached to the back of the frame using sticky tape.
This project was quick to put together and looks sensational in real life. The photos don't really do it justice. The sparkle catches the light and the banner casts a pretty shadow over the glass frame, inviting the viewer in for a closer look.
These little cuties are so easy to make using the gift bag thinlet dies. The extra pieces that come with them give you lots of alternative uses for cards, boxes and scrapbook pages.
The Retirement list is out!
Hop on over to the store and grab a bargain. Ending on the 2nd June and only available till sold out. www.Aussiestampers.stampinup.net
Well, this year has gotten off to a great start, with a feature article of my classes in BE magazine, and a trip on the Royal Caribbean Line teaching card making on board! What fun! We had a fabulous sale in our last class and of course Stampin' Up's! SALE-A BRATION is on till the 31st of March.
Thank you so much to my wonderful friends and loyal customers who make all this possible.
Hello everyone, I hope you had a wonderfully creative holiday season. I know we were certainly busy leading up to Christmas with masses of Cards, Tags, Gift Boxes, and even a Christmas angel for the tree!
I am starting the year
off with a giant sale of stamps, (new and used), papers, accessories and
assorted paper craft goodies! Drop in any time between 11am and 3pm to
make a couple of cards with the beautiful new watercolour and chalkboard
stamps, join us for a coffee, then bag some bargains to take home with
you.
If you haven't been for a while, or if you are a newbie, we would love
to have you join us. Pick up a new catalogue (included in the class
price, along with the cards you will make) and get a sneak peek at some
of the new trends in card making for 2015.
No need to bring anything. All materials are provided.
This beautiful Vellum paper comes in either silver or gold, so you could make either colour box. One packet of vellum will make 18 boxes for your guests. The foil embellishments and glimmer paper also come in gold as well. Confetti hearts and stars scattered on the table using the border punches and glimmer paper would set off your table setting magnificently!
Quick and Easy Project. This Chocolate Slider Box will hold 2 chocolate bars, although I only used one in this video.....did someone EAT the other one? ....(could have been me)!
The colours in this card are just divine....Melon Mambo, Daffodil Delight and Bermuda Bay.
I have added an inner layer to balance the weight of the card and it is finished off with some Dazzling Details. We will be making this card in our next class. You can register at http://www.meetup.com/cardmaking-art-papercraft
You can watch the video tutorial here: http://youtu.be/qv8pgN8bXgU
This is the last in the series on the current catalogue....jump on over to my online store for the last of the clearance rack items....get 'em before they're gone for good!
Vicki xx
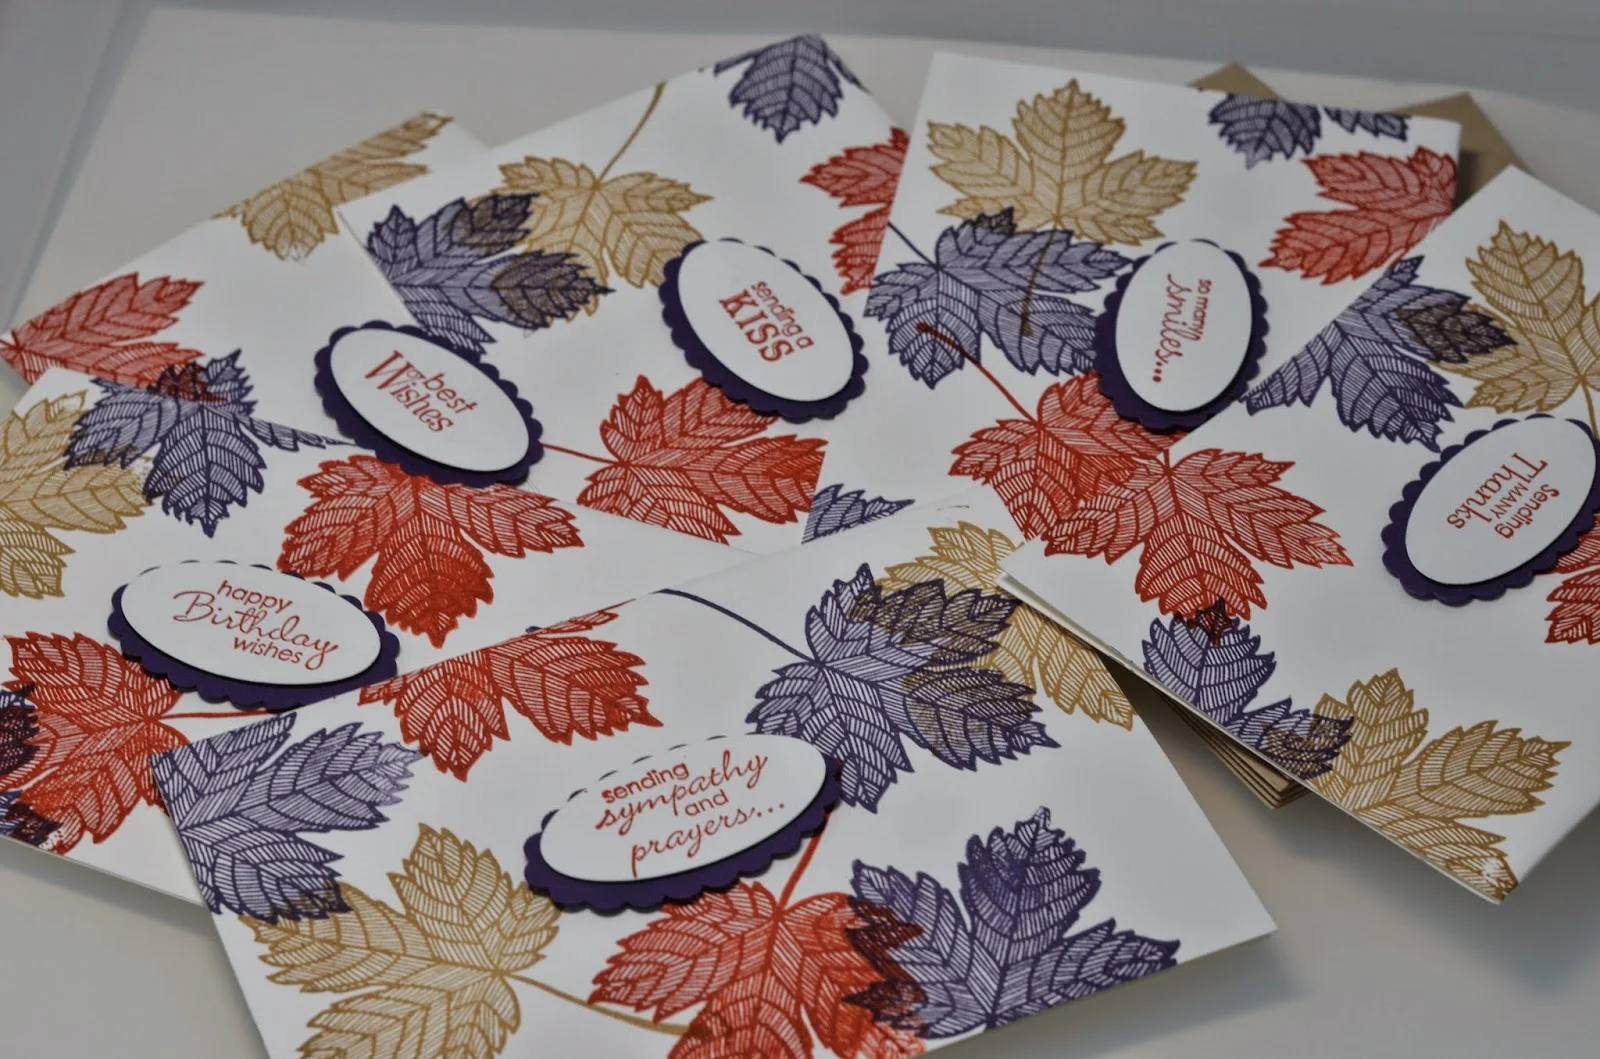
Start with a whisper white card base 14cm x 19.5cm, and fold in half. Using the Magnificent Maple #131868, stamp images in Summer Starfruit, Elegant Eggplant and Cajun Craze.
On a scrap piece of whisper white card stock, stamp sentiments from the Petite Pairs stamp set in Cajun Craze, then punch out using the oval punch.
Layer onto Elegant Eggplant card stock punched out with the scalloped oval punch.
Adhere to the centre of each card using dimensionals (I used different sentiments to make these cards all ocassion ).
Team with the medium envelopes in crumb cake, then using a strip of Whisper white card stock measuring 6.5cm x 30cm, stamp the leaf image again and wrap around the stack of cards and secure with Sticky Strip.
Are you looking for a good template for a necklace (or earrings would work here too)?
I wanted a bespoke box for one of my lockets so I came up with this design.
For those of you who follow me, you will know that I love jewellery and I
was thrilled to find out I could buy Floating lockets in Australia.
They are like wearable works of art, and no two are the same....they are
totally customizable.
There is a link below the video
over on Youtube if you want to find out more, but I see many more
jewellery box templates in the future....ta dah!
For a limited
time you can join Stampin’ Up! for just $85! This amazing opportunity
will only last until June 30, 2014, so take what you already love
doing—stamping and crafting—and make a little money while you're at it!
When you join Stampin’ Up! during this limited-time offer, you’ll receive: