Saturday 20 May 2017

Masked Dauber Dotting Technique. Stampin' Up! Australian Demonstrator.


Hello, and thanks for visiting my blog today. I trust you are enjoying the weekend. We have had some rain here in Sydney today, and I have spent the day in my Happy Place, crafting my little cotton socks off!

I have created a project for you with a technique called Dauber Dotting.

Rather than blending from one shade into the next as you normally would do with a sponge dauber, this technique celebrates the dottiness!


Start by creating the inside of a circle mask using the largest stitched framelits circle. I use Express It Transparent Masking Film, but you could use scrap paper and tape it down with some washi tape. Just be sure to rub your washi onto your clothing first to remove some of the tack, or it still may tear the Shimmery White card stock when you try to remove it.

Start with Daffodil Delight. Blend as usual, but add extra strength dots on top by pounding slightly when you finish blending.  Next add the Peekaboo Peach  and blend as usual, then add pounded dots to the top. Melon Mambo is next. Be sure to start blending off the circle as this is a stronger colour. I did less blending here and more pounding. With Wisteria Wonder blend in from the edge and then pound on top.

Remove the mask and allow to dry. You can speed up the process with your heat gun.


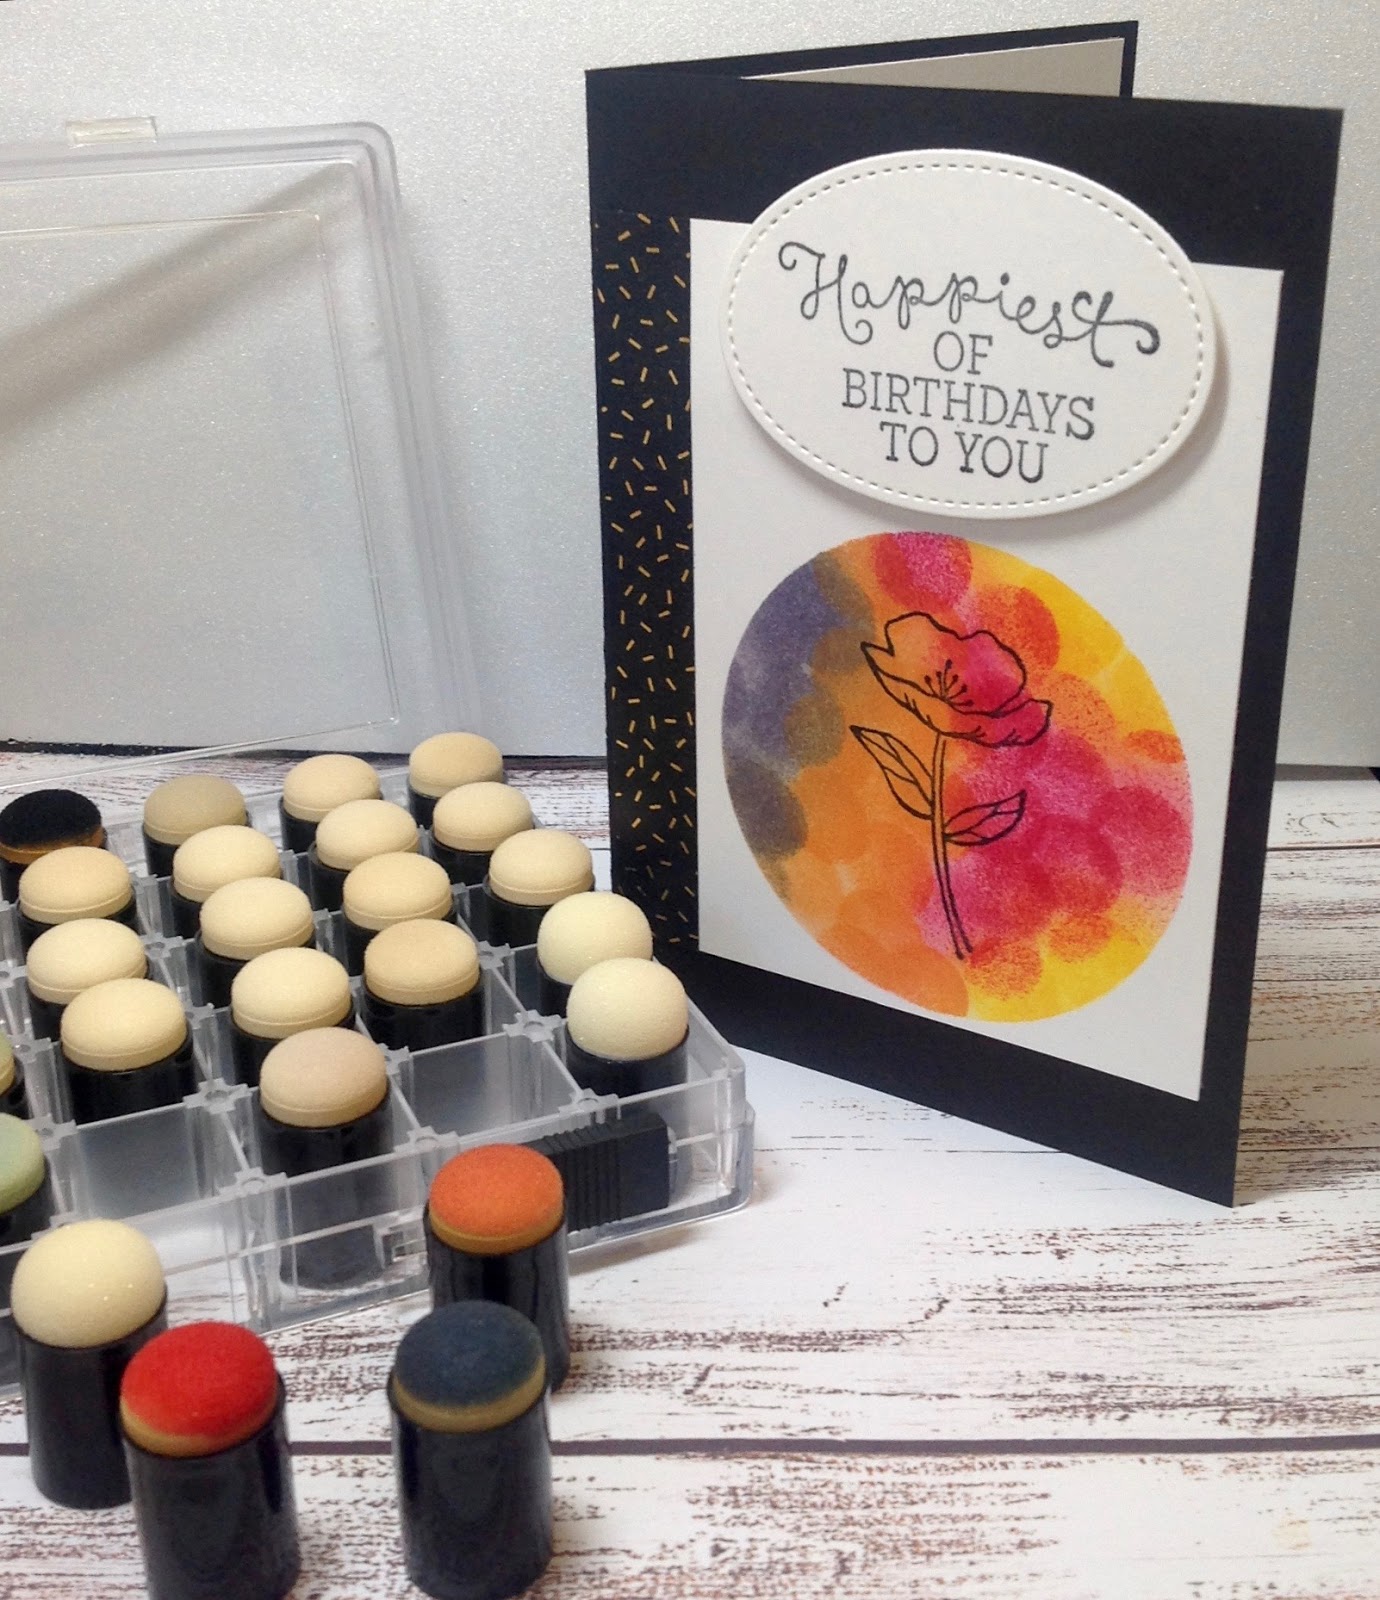
Assemble your card onto a Basic Black card base, and add a Shimmery White layer to the inside, so a message can be written to the recipient of your card.

I stamped the smaller flower from Birthday Blooms #140658  onto the inside layer as well as onto the art piece sponged circle. I do love the inside of my cards to look as lovely as the outside!

                                                          Birthday Blooms  Photopolymer #140658  

I adhered a strip of washi tape from the Pop Of Pink suite down the side edge. Next I stamped the sentiment from the Birthday Blooms Stamp set onto Shimmery White card stock and cut out using the oval framelits. I popped this up on dimensionals and the card was done!

                                I hope you give this a try. Have a good weekend.
                                         
                              Thanks so much for shopping with me!  Vicki  x 💝 
                                                     BUY NOW


Thursday 18 May 2017

Sneak Peek: Color Theory Suite.

Hello, and thanks for visiting my blog.
Today I have a SNEAK PEEK for you! This coordinating set is a suite for all seasons.
From June 1st, you will be able to order a whole swag of new stamps, embellishments and crafting goodness! Aren't these cards so pretty?
Watch the video and put these on your wish list. You will be able to purchase these from me from June 1st, and I will have the new catalogue download on my blog for you to browse through. I am also planning a new catalogue Walk Through on my Aussie Stampers Youtube Channel to highlight my favourite things. 


Watch the Video


                                     Thanks so much for shopping with me!  Vicki  x 💝

Monday 15 May 2017

Remarkable Rock and Roll Technique. Stampin' Up! Australian Demonstrator

                                             
                                                      Hello, and welcome to my blog.
 The Remarkable You Stamp Set (Wood Mount #139891 Clear Mount #139894) has a beautiful leaf image that I wanted to use in a different way, so I designed a card to demonstrate the "Rock and Roll" technique. You can see in the photo that the leaves have 2 different colours.

When you are doing this technique, start by inking the stamp in the lighter colour first, (in this case Bermuda Bay), then without cleaning the stamp, leave the stamp facing upwards on your desk and roll some darker colour (in this case Island Indigo) onto the back of the stamp, and rock the darker colour over the lighter colour. You don't want to cover up the lighter colour completely, just add some highlights.
                                               
This will give a really pretty effect.

 I masked off the bottom of the stems, or you could simply cut the card stock in half and hide the join under the black banner, which is popped up on dimensionals.


 I also wanted to use the sentiment "every heart needs someone to love" from the Falling For You stamp set #143109, which has a coordinating sentiment for the inside of the card that says " you're my person." How adorable is that!
I heat embossed the image onto Basic Black card stock using white embossing powder, and mounted the art pieces onto a basic black card base.

Here is the inside of the card.


I used my copic marker BG13 to colour 2 large, 2 medium and 2 small rhinestones (make sure you let them dry before using them) to finish the card.
I like to make the inside as pretty as the outside when I make a card. If you are decorating inside make sure to adhere a plain whisper white layer above your art piece on the inside of the card to write your message on.


That's all for today. I hope you enjoy my projects, and I love your comments :)

Have a creative day. 
 Thanks so much for shopping with me!  Vicki  x 💝

Remarkable You  Stamp Set   Wood Mount 139891   Clear Mount 139894

Falling For You Stamp Set   Wood Mount 143106   Clear Mount 143109


Saturday 13 May 2017

Copper WOW! Card with the Pansy Punch. Stampin' Up! Australian Demonstrator.


Hello, and welcome to my blog.
 I have been on the river today, and had an unintended swim off the end of our wharf when I capsized the kayak while trying to get in! Very funny, and the river was surprisingly warm. I was fully clothed, which made it even funnier, and I managed to keep my sunglasses and baseball cap on, in spite of being dunked underwater! After a nice warm bath (yes, I still went kayaking in my wet, wet clothes), when Paul and I got back, I decided some crafting was in order, and I came up with this lovely little number. I am quite pleased with how it turned out. What do you think?


I am happy to say the pansy punch is carrying over into the new catalogue, and I decided to team it with the "Affectionately Yours" #141632 Designer Series Paper. The copper accents in the paper were a perfect pairing with some copper foil, and I used the Pretty Pines Thinlit dies #141851 as foliage. I have paired these leaves and buds with flowers before and they work really well.  


Here is a close-up of the flowers, which were layered up on dimensionals, after a little shaping. I punched out 2 half inch circles for the centres, and used Night of Navy Card stock and ink to layer it all onto a crumb cake card stock base. The sentiment is from the Paisleys and Posies stamp set #142196, and the Navy pansy was stamped with "Flower Shop" #130942 before being punched out.


                                           That's all for today, and thanks for stopping by.


  Thanks so much for shopping with me!  Vicki  x 💝

Best Birds Class: Make 6 Cards. Stampin' Up! Australian Demonstrator.

Hello, and thanks for stopping by my blog.

There is something about the combination of navy and white that is easy on the eye, and yet makes a statement all at the same time.

 For this class I used the Best Birds Stampset #141525 and matching thinlits Birds And Blooms #141477 in as many different ways as I could imagine,  using Night of Navy and Whisper White as the colour scheme. 
The gorgeous Designer Series Paper Floral Boutique #141663 is the perfect accompaniment to this symphony of blue!

                                    Here are the finished 6 cards in The Best Birds class.

                               The White Organza Ribbon #114319 makes a pretty accessory 
teamed with 3 White Perfect Accents #138416

                        Here you can see the rhinestones I coloured with a navy Copic marker.

                       A stitched oval Thinlit is strategically placed inside to write the message on.


                             The tiny die cut bird needed a reverse image to complement him.
                                      The inside of the card reads "on your wedding day."

                       This card uses the open die cut shape, and the bird was saved for later.

Heart die cut with both birds "kissing" for an anniversary card.


Thanks for visiting. I hope to see you in a class soon!
Vicki x 💝

Thursday 11 May 2017

Awaiting the new coffee cup framelits!

                                     
                                         Hello, and thanks for visiting my blog today.
I have been loving all the new products in the catalogue, and can't wait to show you a New Catalogue Walkthrough on Youtube when the catty goes live on June 1st.

I am over the moon that there will be a coffee cup stamp with matching framelits. Yay! I am planning cards for my local cafe to sell, and I had already put together these little cuties using up the rest of my designer series paper, and had a fit of nostalgia over how well-loved this old stamp set was.

I can't show you what's inside the new catty yet, but I hope this whets your appetite for more coffee stamps! And more cups of coffee! Haha.

                                                    Till next time, Vicki x 💝


Wednesday 10 May 2017

My June Card Making Class. Register Here.

In June I am focusing on the Happy Celebrations Stamp Set and Embossing folders.
These folders give a lovely Letterpress effect, and I showed an example of this type of card in my Mothers Day Card post.
In the June class we will be making 6 different cards.
  Here is a video preview of my next class in June. 
You can register for this class and any upcoming classes at 
      www.meetup.com/cardmaking-art-papercraft

 Thanks so much for shopping with me!  Vicki  x 💝

Baby Onesie with vellum and distressing


Hello, and welcome to my blog. Here is a project for you that uses vellum as an underlay.

When you slightly offset the layers, you can achieve a look that is right on-trend.

The colour scheme is bermuda bay, mint macaron and so saffron.

The baby onesie has been cut out using the matching framelits, and is adhered using washi tape and the sentiment, so that the sleeves are partly lifting from the page. This is a very subtle kind of layering, especially with the white-on-white colour scheme.

Finish off your card by slightly curling the edges of the layers, then distressing the edge of the card with your fingernail before adhering everything together using Tombow multi adhesive.

Add a bakers twine bow and some small pearls ( 3 is the magic number for these! )  and your card is now complete.

I hope you enjoyed this project.
Vicki x  💝