Saturday 13 May 2017

Best Birds Class: Make 6 Cards. Stampin' Up! Australian Demonstrator.

Hello, and thanks for stopping by my blog.

There is something about the combination of navy and white that is easy on the eye, and yet makes a statement all at the same time.

 For this class I used the Best Birds Stampset #141525 and matching thinlits Birds And Blooms #141477 in as many different ways as I could imagine,  using Night of Navy and Whisper White as the colour scheme. 
The gorgeous Designer Series Paper Floral Boutique #141663 is the perfect accompaniment to this symphony of blue!

                                    Here are the finished 6 cards in The Best Birds class.

                               The White Organza Ribbon #114319 makes a pretty accessory 
teamed with 3 White Perfect Accents #138416

                        Here you can see the rhinestones I coloured with a navy Copic marker.

                       A stitched oval Thinlit is strategically placed inside to write the message on.


                             The tiny die cut bird needed a reverse image to complement him.
                                      The inside of the card reads "on your wedding day."

                       This card uses the open die cut shape, and the bird was saved for later.

Heart die cut with both birds "kissing" for an anniversary card.


Thanks for visiting. I hope to see you in a class soon!
Vicki x 💝

Thursday 11 May 2017

Awaiting the new coffee cup framelits!

                                     
                                         Hello, and thanks for visiting my blog today.
I have been loving all the new products in the catalogue, and can't wait to show you a New Catalogue Walkthrough on Youtube when the catty goes live on June 1st.

I am over the moon that there will be a coffee cup stamp with matching framelits. Yay! I am planning cards for my local cafe to sell, and I had already put together these little cuties using up the rest of my designer series paper, and had a fit of nostalgia over how well-loved this old stamp set was.

I can't show you what's inside the new catty yet, but I hope this whets your appetite for more coffee stamps! And more cups of coffee! Haha.

                                                    Till next time, Vicki x 💝


Wednesday 10 May 2017

My June Card Making Class. Register Here.

In June I am focusing on the Happy Celebrations Stamp Set and Embossing folders.
These folders give a lovely Letterpress effect, and I showed an example of this type of card in my Mothers Day Card post.
In the June class we will be making 6 different cards.
  Here is a video preview of my next class in June. 
You can register for this class and any upcoming classes at 
      www.meetup.com/cardmaking-art-papercraft

 Thanks so much for shopping with me!  Vicki  x 💝

Baby Onesie with vellum and distressing


Hello, and welcome to my blog. Here is a project for you that uses vellum as an underlay.

When you slightly offset the layers, you can achieve a look that is right on-trend.

The colour scheme is bermuda bay, mint macaron and so saffron.

The baby onesie has been cut out using the matching framelits, and is adhered using washi tape and the sentiment, so that the sleeves are partly lifting from the page. This is a very subtle kind of layering, especially with the white-on-white colour scheme.

Finish off your card by slightly curling the edges of the layers, then distressing the edge of the card with your fingernail before adhering everything together using Tombow multi adhesive.

Add a bakers twine bow and some small pearls ( 3 is the magic number for these! )  and your card is now complete.

I hope you enjoyed this project.
Vicki x  💝

Monday 8 May 2017

You're Sublime : 2 Cards. Stampin' Up! Australia.


You're Sublime  #138737 wood Mount    #139309 Clear mount 


Who doesn't love a vintage caravan? This card is fun and carefree, just like the sentiment! 

*Layer some mint macaron Designer Series paper #138432 onto a Whisper White Card base.
*Stamp the image onto a Whisper White piece using Basic Black Archival ink
* Colour using markers and a blender pen in So Saffron, Mint Macaron, Basic Black and Calypso Coral
*Attach to the card front with liquid glue and add 2 torn strips of black wash tape
* Punch out 3 hearts from Calypso Coral Card Stock with the Confetti Hearts Border Punch and attach with snail adhesive. 
* Finish with a bow in black and white bakers twine, adhered with a mini glue dot.


This simple card is another pretty combination of colours, and you can make your own co-ordinating envelopes with the Envelope Punch Board #133774 using envelope paper #141697 or Designer Series Paper #138432
This  card is made using the same technique as the first, with the markers colours of
Mint Macaron, Smokey Slate, Daffodil Delight, Old Olive, Blushing Bride and WatermelonWonder.
*You can add a touch of Smokey Slate shadow below the wheelbarrow to "ground" your piece so that it doesn't look as though it's floating on the page.
*Stamp the greeting a second time on a scrap of whisper White 
*Use the Duet Banner punch to make the banner, and adhere the banner on top of the stamped greeting.
Duet Banner Punch #141483

Happy crafting, and thanks for visiting!
 Thanks so much for shopping with me!  Vicki  x 💝

Sunday 7 May 2017

Carry-over Pansy Punch: Give it some Pizzazz!

I really love using punches as a quick pop-up on a card, and wanted to do something extra special with the Pansy Punch, as it is carrying over into the new catalogue. I stamped using the Flower Shop stamp set onto whisper white, once in crushed curry, and once in melon mambo. Using my blender pen I darkened the inner half of the petals, then punched them out with the pansy punch.
I stamped the "thanks" greeting from Thankful Thoughts using emerald envy towards the bottom of a smaller piece of card stock and cut it out using the stitched framelits.

I arranged this on a plain whisper white card base to decide where I wanted to stamp the images from Touches of Texture.
Once I had my layout planned I stamped the bouquet image twice using emerald envy, then the larger splashes in melon mambo, and the finer splashes in crushed curry. I coloured the bouquet image with my blender pen, but going a little outside the lines to give a soft watercolour look.  


Everything was popped up on dimensionals and I stacked 2 dimensionals together for the pink pansy, after curving the petals with my bone folder. Coordinating bling in each of the 3 colours completed my card. I love how it turned out. It is cheerful and pretty, and gives the pansy punch a whole new lease of life. I also decorated the inside of the card with the emerald envy bouquet branch.


Thanks for stopping by my blog. Enjoy the rest of your weekend.
 Thanks so much for shopping with me!  Vicki  x 💝

Hostess Sets: Gift of Love Cards. Stampin' Up! Australia.

If you haven't taken a look at the hostess sets on page 198-201 of the catalogue, then you are missing the best buy in stamps! These stamp sets are priced well below retail value and are a great way to spend your Stampin' Rewards.

To make these cards you will need the Hostess stamp set Gift of Love #141796 , $AUD17.00, which can only be purchased with Stampin' Rewards (which you receive after your order totals $250 excluding shipping and handling)


*On a card base of Basic Black add a panel from the Pop of Pink Specialty Designer Series Paper #141648.
*Add a layering panel of Whisper White, and stamp your image with Basic Black Ink.
*Stamp Daffodil Delight flowers, then Cucumber Crush for the leaves. 
*Using an aqua painter, pick up some ink from the lid of your pad and flick some Daffodil Delight across the page. 
*Wrap some linen thread around the panel and staple a small edge of doily onto the front. 
*Use versamark ink to stamp the greeting on a small piece of basic black card stock, then emboss with white embossing powder (be sure to use your embossing buddy first). 
*Adhere all the pieces with fast fuse or snail.


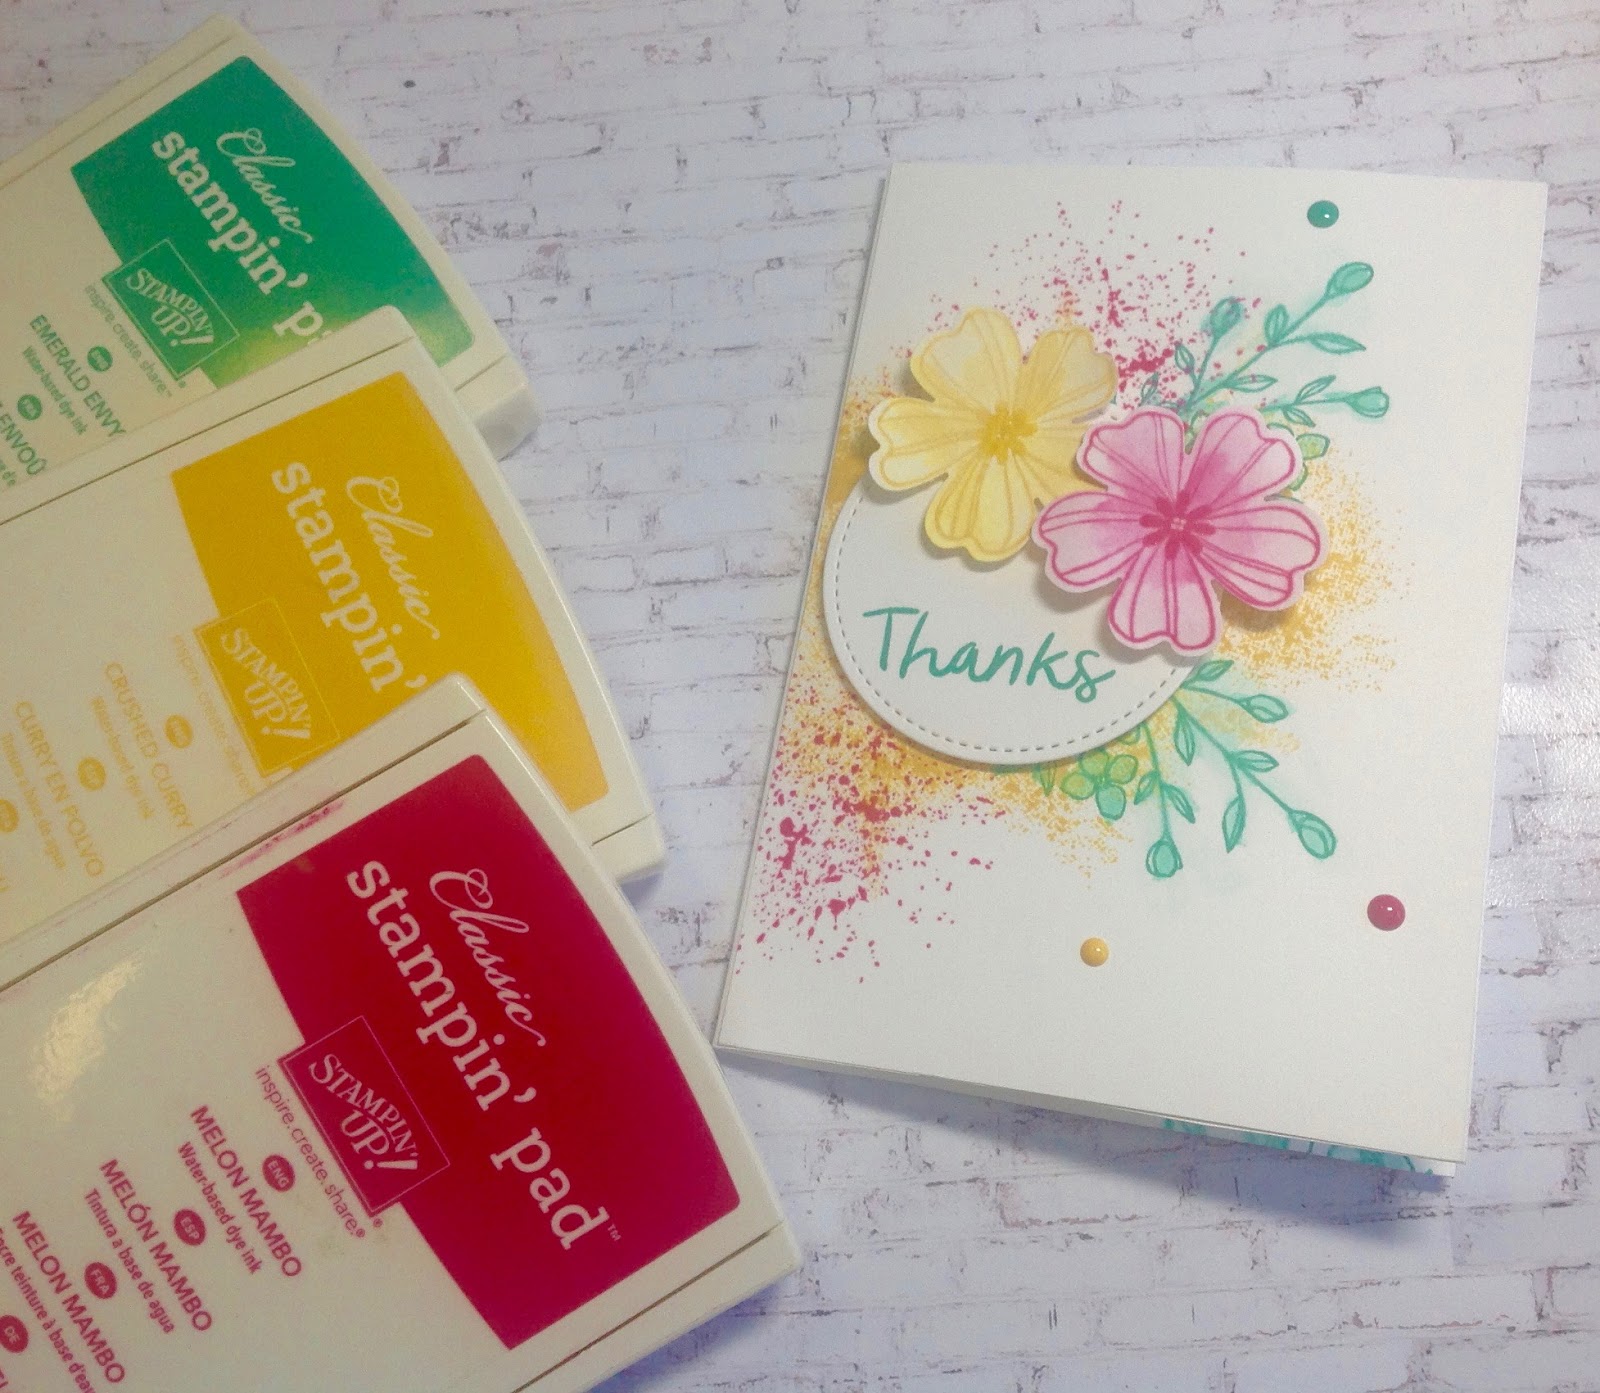
The thing I like the most about this next card is the pretty, soft colour.
*On a panel of Watercolour Paper using your aqua painter do a quick wash of Pink Pirouette and So Saffron inks. Set aside to dry.
*Next stamp Basic Grey archival ink onto a seperate piece of watercolour paper,   and using your aqua painter colour the flowers in Pink Pirouette. Add a tiny amount of Rose red in the centres and blend outwards.
*Colour the stems in Old Olive ink. Set aside to dry.
*Come back to the original watercolour washed piece and stamp the greeting in Soft Suede Ink.
*Flick some Soft Suede ink across the page using your aqua painter.  Set aside to dry.
*Cut out the floral image with your paper snips.
*Adhere a strip of Very Vanilla Lace Trim #141672 under the greeting with mini glue dots.
*Pop up the floral image on dimensionals.
*Adhere to a Watercolour paper card base with dimensionals.

These are really pretty projects and I hope you give them a try!
Happy Crafting,
Vicki x  💝


Friday 5 May 2017

Copic Puppy and Kitten : Pretty Kitty meets Bella And Friends!


Hello, and thanks for visiting my blog today!

 Aren't these little guys too cute! Our dog Koby is a Maltese Poodle Cross and I just had to have the Bella and Friends stamp set, as well as the Pretty Kitty set.

I decided these two needed to be best friends, so I tied a balloon to each of their tails and coloured them with my Copic Markers, after stamping in Memento Tuxedo Black Ink.

I also gave them both rosy cheeks, and made the puppy a boy and the kitty a girl, with their blue and pink collars!
I added some shine to the balloons with a white Gellyroll marker. 

I have an ever-expanding selection of markers and pencils, as well as my Copics (I am an Intermediate Copic Designer), and love watercoloring as well. Over the last two years I have been studying watercolour painting at the Regional Gallery at Hazelhurst and I will be showcasing some of my work here on the blog from time to time.

To finish the card I matted the sentiment onto a crumb cake base using the Stitched Framelits, then adhered everything to a Basic Black Card base.
Of course I love to finish my cards on the inside as well, so I chose the seated version of the kitty and the puppy and simply stamped them on either side of the inside layer in black, and left them uncoloured. I wanted the outside to steal the show.

What do you think? Pretty cute, right?
Here are the supplies you will need, plus whatever you choose to colour your card with.

 Pretty Kitty Wood Mount #141861   Clear Mount #141864
Bella And Friends Wood Mount #141867  Clear Mount #141870

Stitched Shapes #145372
Memento Tuxedo Black Ink #132708


Have an awesome day. Thanks for shopping with me.
Vicki x  💝