Love Today Planner: See how to make this tracker using a washi tape hack! Lots of ideas in my series
25 Planner Hacks You Need To Try. #25PlannerHacks
Watch : www.Youtube.com/AussieStampers
Grab your Love Today planner and refill kit and try these 25 Planner Hacks. Quick, simple and easy!
See my video series here. www.Youtube.com/AussieStampers
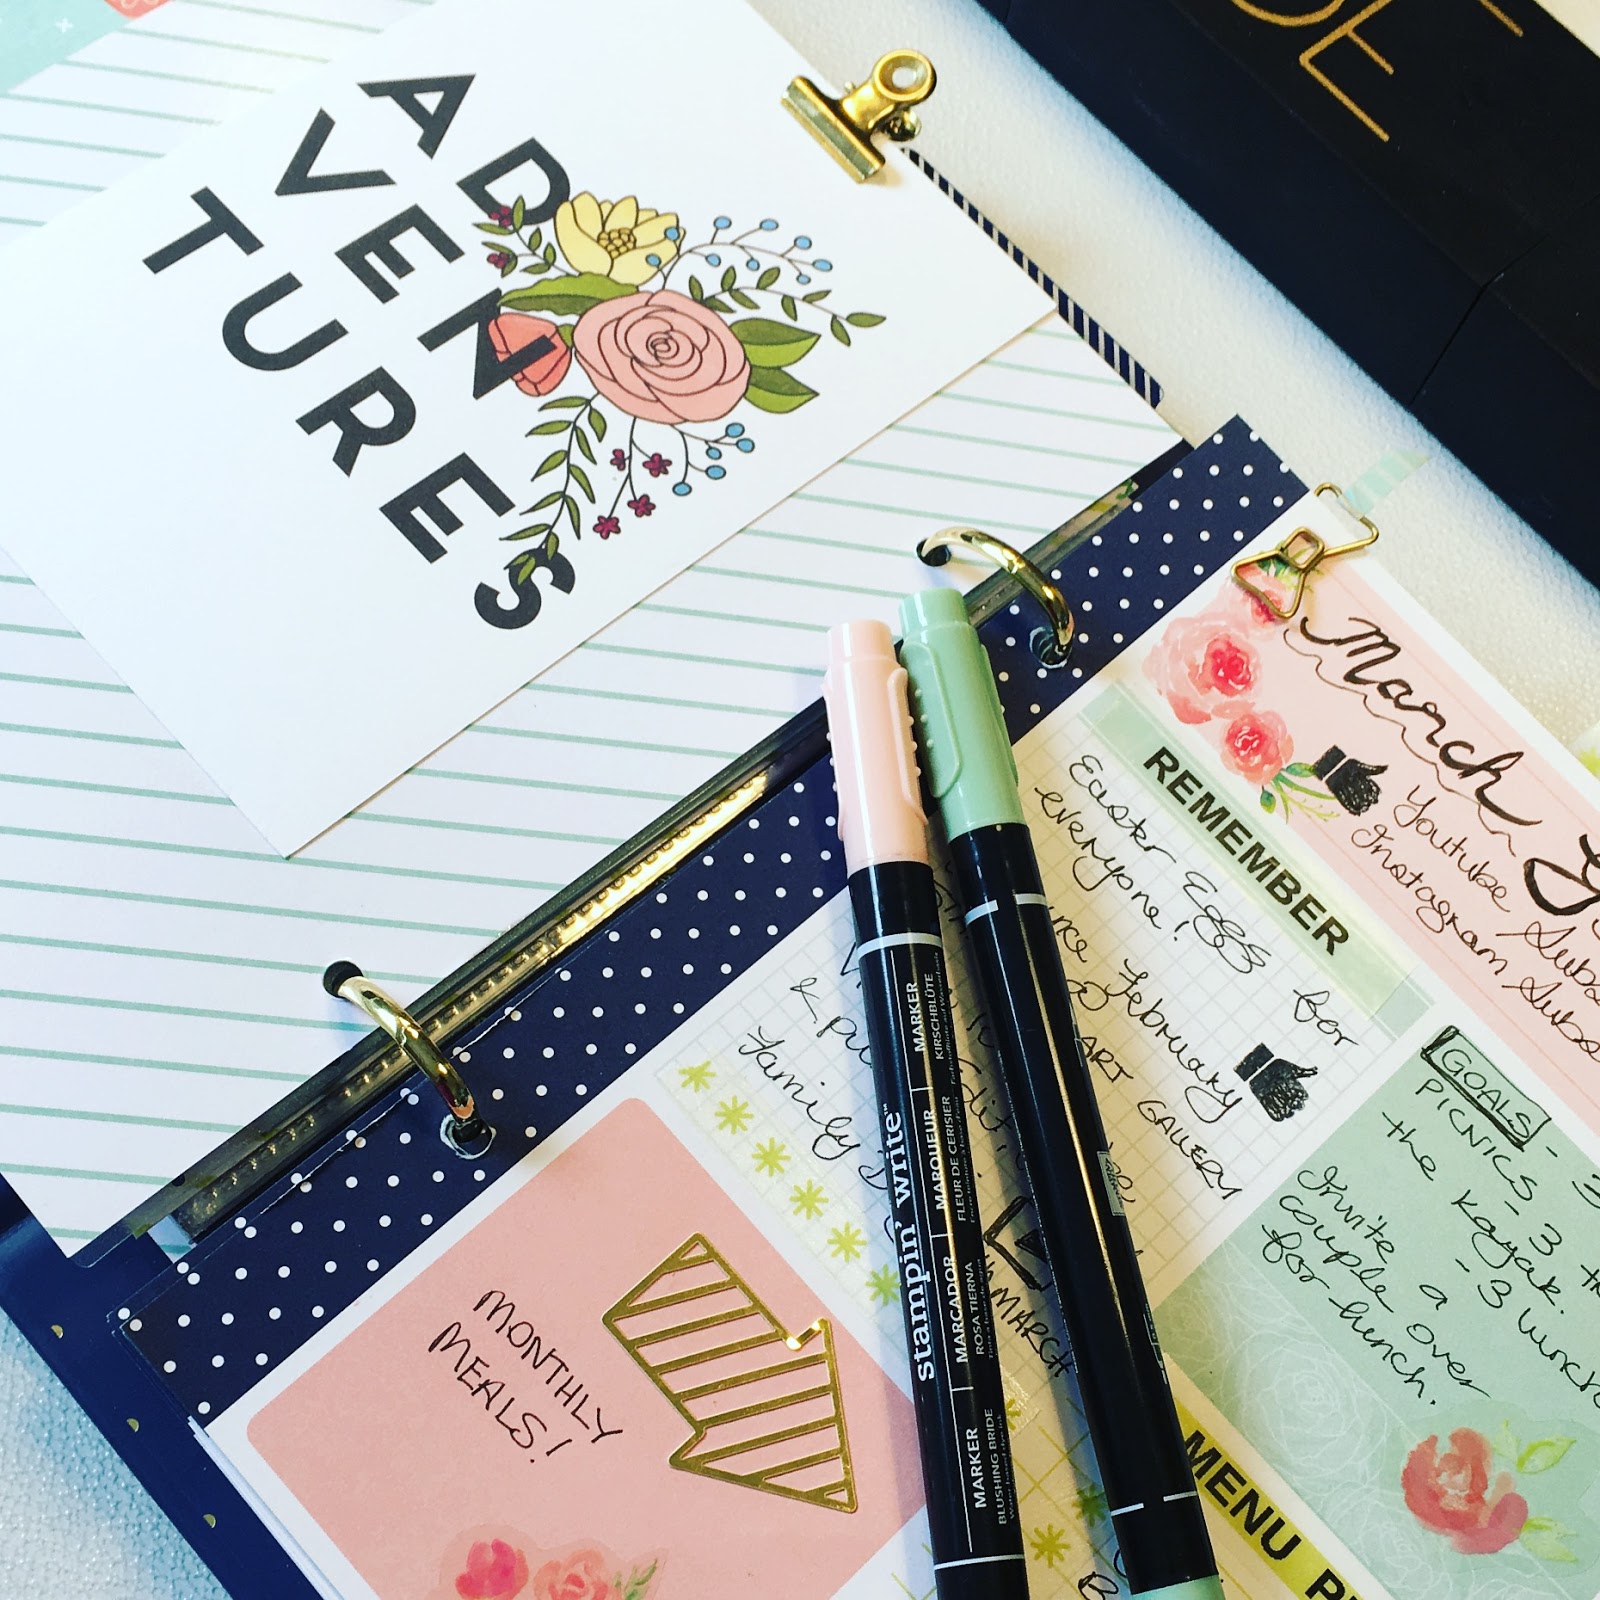
I love documenting memories in a Travellers Sized Notebook. I made traditional 12" x 12" albums for over 20 years, and much as I love my old albums, they are very difficult to store on a shelf, as most bookshelves are neither tall enough nor deep enough to house them.
I like to print on my home printer, and we all know the cost of ink refills! One of the great things about the smaller sized canvas of a Travellers Notebook is that you can put much smaller photos into your layout and still feel that the photo commands attention, rather than being swallowed up in a plethora of "similar" shots (yes, I know it's hard to choose just one shot when you have snapped dozens of photos of that birthday event, or that holiday ) in order to fill the double page spread of a 12" album.
However, what I am finding now is that I want to document much more regularly, rather than JUST birthdays and holidays, and documenting daily life is really important to me as a way of keeping a visual diary of my life as a newlywed.
Paul and I are crafting a life together, and remembering all the simple rituals and daily routines is turning out to be fun!
Life is a matter of moments.
I hope you enjoy this process video, and if you haven't already subscribed to my Youtube Channel, please consider doing so, and if you have a friend or two who you think may enjoy my tutorials please share the video!
Hello and welcome to today's blog post and papercraft project. I wanted to try some simple colouring using Prismacolor Pencils. These pencils have a gorgeous silky feel and are my pencils of choice for really smooth blending.
I kept it simple, and made sure to ground the image with some sketchy green so it doesn't appear to be floating on the page.
I used tuxedo memento black ink for all the stamping, and made sure to include a greeting inside the card as well as the sweet butterfly image.
I love doing a single layer card once in a while, and keeping it simple.
Thanks for stopping by, and I hope you enjoyed today's project. Vicki x
There is a video tutorial for this set of cards at the end of this post.
I have three special cards for you today, and I know you're going to love this technique.
I have used the stamp set "A Little Wild " to create a set of Tulle Window Cards that are as cute on the inside as they are on the outside!
I have floated the images on a sparkly tulle window that is sandwiched between the layers.
This technique is also suitable for acetate sheets if you don't have any tulle handy, although tulle is readily available in any fabric store and is inexpensive too. I found this soft white tulle with silver sparkly glittery pieces embedded in the fabric, at Spotlight.
I cased this idea from the very talented Jennifer McGuire, and have put a link to her post in the video.
The stamp set I have used really suits this technique, since it not only has matching framelits, but also has an image of the back of each of the cute little animals that match perfectly.
See how cute the inside of each of the cards looks! Aren't they just darling? I REALLY love this technique.
I hope you give these a try. You can purchase the stamp set and framelit bundle, as well as the Stitched Framelits that were used to cut out the windows, from my online Stampin' Up! Store
A Little Wild Bundle
145327 Wood Mount $85.50
145328 Clear Mount $73.75
Stitched Shapes Framelits 145372 $50.00
Other supplies Used:
Thick Whisper white Card Stock
Soft Suede Card Stock
Smokey Slate Card Stock
Sahara Sand Card Stock
Stampin' Write Markers
Aqua Brush
Wink of Stella Pen
Tear and Tape adhesive
Tombow Multi Adhesive
Stampin' Dimensionals
Mettallic Enamel Shapes
Balloon Celebrations Stamp Set
Balloon Punch
White Embossing Powder
Versamark Ink
Fine Tip Glue
Here is the Video Tutorial.
Have a good weekend, thanks for visiting, and happy crafting!
Hello, and thanks for visiting. I trust you are enjoying your Saturday. It is rainy outside, but cosy in my craft room She Cave!
Don't you just love a quick and simple treat bag?
I am giving away this stamp set as a part of my BOGOF Sale, or maybe I should be calling it my EOFY sale?
Anyway, how it works is, for every $50 in product you spend in my online store at www.AussieStampers.stampinup.net during June, you can choose a retired stamp set from my stash of goodies for free!
This is strictly first in first dibs, so hop over to my AussieStampers Facebook page and see the sets that are still available. If you spend $50 it's one stamp set or framelit set, $100 is 2 sets, $150 is 3 sets and so on. Simply write SOLD under the photos I have posted of the available retired, gently used sets, and I will send them to you in the post as a thank you gift!
Thanks for stopping by, and have a wonderfully creative day.
Here are 2 cards I put together using different techniques. I made the first card on Stampin' Up! Shimmery white paper, which I had lightly spritzed with water and matted it to a DSP background
I stamped a separate piece of card stock with the sentiment and popped it up on dimensionals, then added 3 small rhinestones that I had coloured with Copic markers and left to dry.
For the second card I used a vellum overlay, after stamping the image as a background . I white embossed the vellum, then added a Tempting Turquoise piece of card underneath so the greeting would show through. I attached the vellum to the top of the card using Washi Tape and I mounted it all onto a thick white card stock base. I fussy cut another bloom I had stamped and lightly spritzed and adhered it to the vellum as the focal image. I love how the background peeks through!
I hope you enjoyed today's project. Have a great weekend.
Hello, I have BIG NEWS for you today! I am giving away all my Retired Stamps and Framelits as a thank you gift to my online customers. Here is a video of what's available.Once you have placed an order of $50 or more in product (excluding postage and handling) you qualify for free stamps!
All the stamps available are listed on my Facebook page, and many of the sets have coordinating framelits, which are also up for grabs.
This is an exclusive offer from me personally, and is a way for me to thank my loyal customers.
Simply go to my Aussie Stampers Facebook page and write SOLD under the sets you would like me to send you.
A spend of $50 = one stamp set or Framelit set.
A spend of $100 = 2 stamp sets or Framelit sets
A spend of $150 = 3 stamp sets or framelit sets
and so on.
I will post them to you free of charge, anywhere in Australia. (You will still need to pay postage on your Stampin' Up! order us per usual ).
I love working on canvases. The work we do as card makers and paper crafters is often more art than card, and in this case I wanted to try something that I could use as a home decor piece.
The stamp set Birthday Blooms is one of my absolute favourite sets for colouring. I used Shimmery White card stock, and stamped half of the blooms in Tempting Turquoise ink, and the other half in Dapper Denim ink.
I coloured inside the petals using a number 2 round brush and used the squeezed-together ink pads as my palette, drawing some of the colour from the stamped lines to soften the edges.
After the flowers had dried, I added some Crushed Curry with my marker to the centre of the two large blooms.
I cut out all the blossoms, and used some olive green felt to cut out the leaves with the Pretty Pines thinlits dies.
I adhered everything onto a 6" x 6" piece of Serene Scenery Designer Series Paper with the lovely Bokeh Pattern, which I had adhered to an 8" x 8" pre - primed canvas.
I popped up a sentiment, "Thankful Grateful Blessed" from the Paisleys and Petals stamp set, which I had white heat embossed onto an old olive piece of card stock.
To give everything a shimmer, I added accents with a clear Jelly Roll gel pen.
This art piece now has pride of place in my entry way, and I love it!
Thanks for visiting. I hope you like this project idea.